Saturday, March 3, 2012

Mudslide!!


Over a year ago a group of my friends and I decided to start a book club. The idea was simple: we'd get to read books that we otherwise wouldn't have read and it would be an good excuse to get together and hang out (and of course drink).  That's right, I said drink. My friends and I can drink with the best of them. So when it was time to meet up for our most recent book club meeting I thought it was appropriate to make some boozy cupcakes, yet again. 

As I was looking through one of my favorite blogs, The Cupcake Project, I saw a recipe for pumpkin mudslide cupcakes and was intrigued. I still want to make them, but a couple people said they though the mixture of pumpkin and mudslide sounded weird so I decided to make a regular mudslide cupcake with a Kahlua cream cheese frosting. A few months ago I made a White Russian cupcake and was really disappointed with the result because I could hardly taste any of the alcohol flavor which sort of is the point in a White Russian cupcake. So this time, i decided I was going to amp up the alcohol factor... 


Another fun fact, I finally got to use the whisk attachment on my Kitchen Aid Mixer Stand! As a result, the cupcakes turned out super light and fluffy and rose perfectly. In fact, a coworker of mine declared these cupcakes were the best she'd ever had in terms of the cake consistency.


The recipe I found for the mudslide cupcakes called for a Kahlua buttercream but I love cream cheese frostings so much more so I decided to switch it up and the end result was delicious! The cakes had a hint of the mudslide alcohol flavor. Nothing too strong, but it was definitely there. The frosting was not too overly sweet and had a great Kahlua flavor. Together, the cupcake and frosting tasted like I was drinking a mudslide! 


This is what SUCCESS looks like!! And one last happy picture of a happy baker...


Mudslide Cupcakes
recipe adapted from HandleTheHeat.com

Ingredients
2 1/4 cups flour
1/2 cup unsweetened cocoa powder
1 1/2 tsp baking soda
3/4 cup coffee, room temperature
1/2 cup Kahlua
1/2 cup Bailey's Irish Cream
3 large eggs, separated
3/4 cup sugar
1/2 cup unsalted butter
1 cup light brown sugar

1. Preheat oven to 350 degrees F. Line cupcake pans with liners.

2. Whisk together the flour, cocoa, and baking soda in a medium bowl. Combine the coffee, Kahlua and Bailey's in a liquid measuring cup.

3. Add the egg whites to the bowl of a stand mixer fitted with the whisk attachment. Beat on medium-low speed until foamy. With the mixer still running, gradually add the granulated sugar. Once incorporated, increase the mixer to medium-high speed and continue beating until stiff peaks form. The egg whites should be glossy, not dry.

4. Transfer the egg whites to another bowl and clean our the mixer bowl (or use a second bowl, or use a hand-held electric mixer). With the paddle attachment, cream the butter and brown sugar on medium speed until light and fluffy. Add the egg yolks, one at a time. With the mixer on low speed, alternatively add the flour and the coffee-Kahlua mixture, beginning and ending with the flour mixture. Use a rubber spatula to fold in egg whites.

5. Divide batter evenly between cupcake pans, filling each about 2/3 - 3/4 full. Bake for 18-20 minutes, or until the cupcakes spring back when lightly pressed and a toothpick inserted in the center comes out clean. Transfer the pan to a wire rack and let the cupcakes cool for 5 minutes then remove to rack to cool completely. 

Kahlua Cream Cheese Frosting
recipe adapted from LovinTheOven.com

Ingredients
5 oz cream cheese
6 tbsp unsalted butter
3 tbsp Kahlua
16 oz powdered sugar

1. Cream together cream cheese and butter until fluffy. Mix in Kahlua, then powdered sugar in one cup increments until frosting reaches desired consistency.

Monday, February 27, 2012

Tiramisu cupcakes and Jello Shots!

Unfortunately, working for a bank means rarely having a 2 day consecutive weekend and being married to a fellow banker means its pretty much unlikely that we can both get the same weekends off to plan a "weekend getaway". So when Mike and I get those rare opportunities to both have a 3 day holiday weekend off we make plans! That was the case this past weekend for Presidents Day. Mike and I drove out to Arizona to visit our friends, Chris and Michelle. Like me, Michelle loves cupcakes so it should be no surprise that on top of hanging out and having fun we BAKED SOME CUPCAKES!

That's right, we made cupcakes. But not just any old cupcakes, tiramisu cupcakes. If you haven't ever had tiramisu or don't know what it is then i suggest you RUN to your nearest store and buy some now! Hahaha. All jokes aside, I love tiramisu. Its an Italian cake dessert. Basically, it's made of ladyfingers soaked in coffee and liquor, layered with a whipped mixture of egg yolks and mascarpone and dusted with cocoa powder. Obviously we were going to have to tweak the design a little to make in a cupcake form but the end result was AMAZING. Keep in mind that I don't typically declare my own cupcakes to be "amazing" simply because I am always very critical of what I bake and am pretty sure I can always improve in some aspect. With that said, I still believe these cupcakes were AMAZING!!!

What You'll Need


Tiramisu Cupcakes
recipe adapted from The Cupcake Project's Tiramisu Cupcakes

6 egg yolks
3/4 cup sugar
2/3 cup milk
1 1/4 cup heavy whipping cream
1/2 tsp vanilla
1 lb mascarpone cheese
1 cup strong brewed coffee, room temperature
2 tbsp rum
1 tbsp unsweetened cocoa powder
2 tbsp butter
dark chocolate (to make chocolate curls, optional)
ladyfingers baked in cupcake wrappers (see recipe below)

Homemade Ladyfingers
2 eggs, separated
1/3 cup + 1 tbsp sugar
1/2 cup flour
1/4 tsp baking powder


1. First things first, brew 1 cup of coffee and allow to come to room temperature.
2. In a saucepan, melt dark chocolate and butter over medium-low heat until smooth. Line a small, deep pan such as a bread pan with aluminum foil and pour melted chocolate on top of the aluminum. Place in refrigerator and allow to harden.
3. Next, In a medium saucepan, whisk the egg yolks and sugar together until combined. Slowly add milk and cook over medium heat . Stir occasionally until mixture comes to a boil. Allow mixture to boil for a minute then remove from heat. Cover tightly and chill in refrigerator for about an hour.

Next up, homemade ladyfingers! Preheat oven to 400F and line cupcake tin with cupcake liners.

4. In a small bowl, whisk together the flour and baking powder.
5. In another bowl, beat egg whites on high until soft peaks form. Slowly add 1 tbsp of the sugar and keep beating until they are stiff and glossy.
6. In another bowl, beat the egg yolks and remaining sugar until they become very pale in color.
7. Fold half the egg whites into the egg yolk mixture. Fold in the flour, then the remaining egg whites.
8. Evenly spoon a small amount of the batter into the cupcake liners and bake for 8 minutes. This will be the ladyfinger base of the tiramisu cupcake so you want to make sure there will be enough room on top of the ladyfingers for the mascarpone and whipped cream.

9. Remove the egg yolk mixture from the refrigerator and whisk in mascarpone until smooth, set aside.
10. In a bowl, beat whipping cream and vanilla until stiff peaks form, set aside.
11. In a small bowl, combine coffee and rum. Slowly pour several spoonfuls of the coffee/rum mixture over each ladyfinger, allowing it time to soak into the cake until it stops absorbing.
12. Spread the mascarpone over each soaked ladyfinger.


13. Spoon a dollop of whipped cream on top of the mascarpone.
14. Sprinkle with cocoa powder.
15. Remove the chocolate from the freezer and make chocolate curls using a vegetable peeler. If the curls easily break allow chocolate to warm up slightly. I find this technique works best if the chocolate is at room temperature. Place several of the curls on top of each cupcake.
16. Cover and refrigerate for several hours, until set.


As i said above, these were amazingly good! So good in fact, I don't have a single complaint about them and will definitely be making these again! 

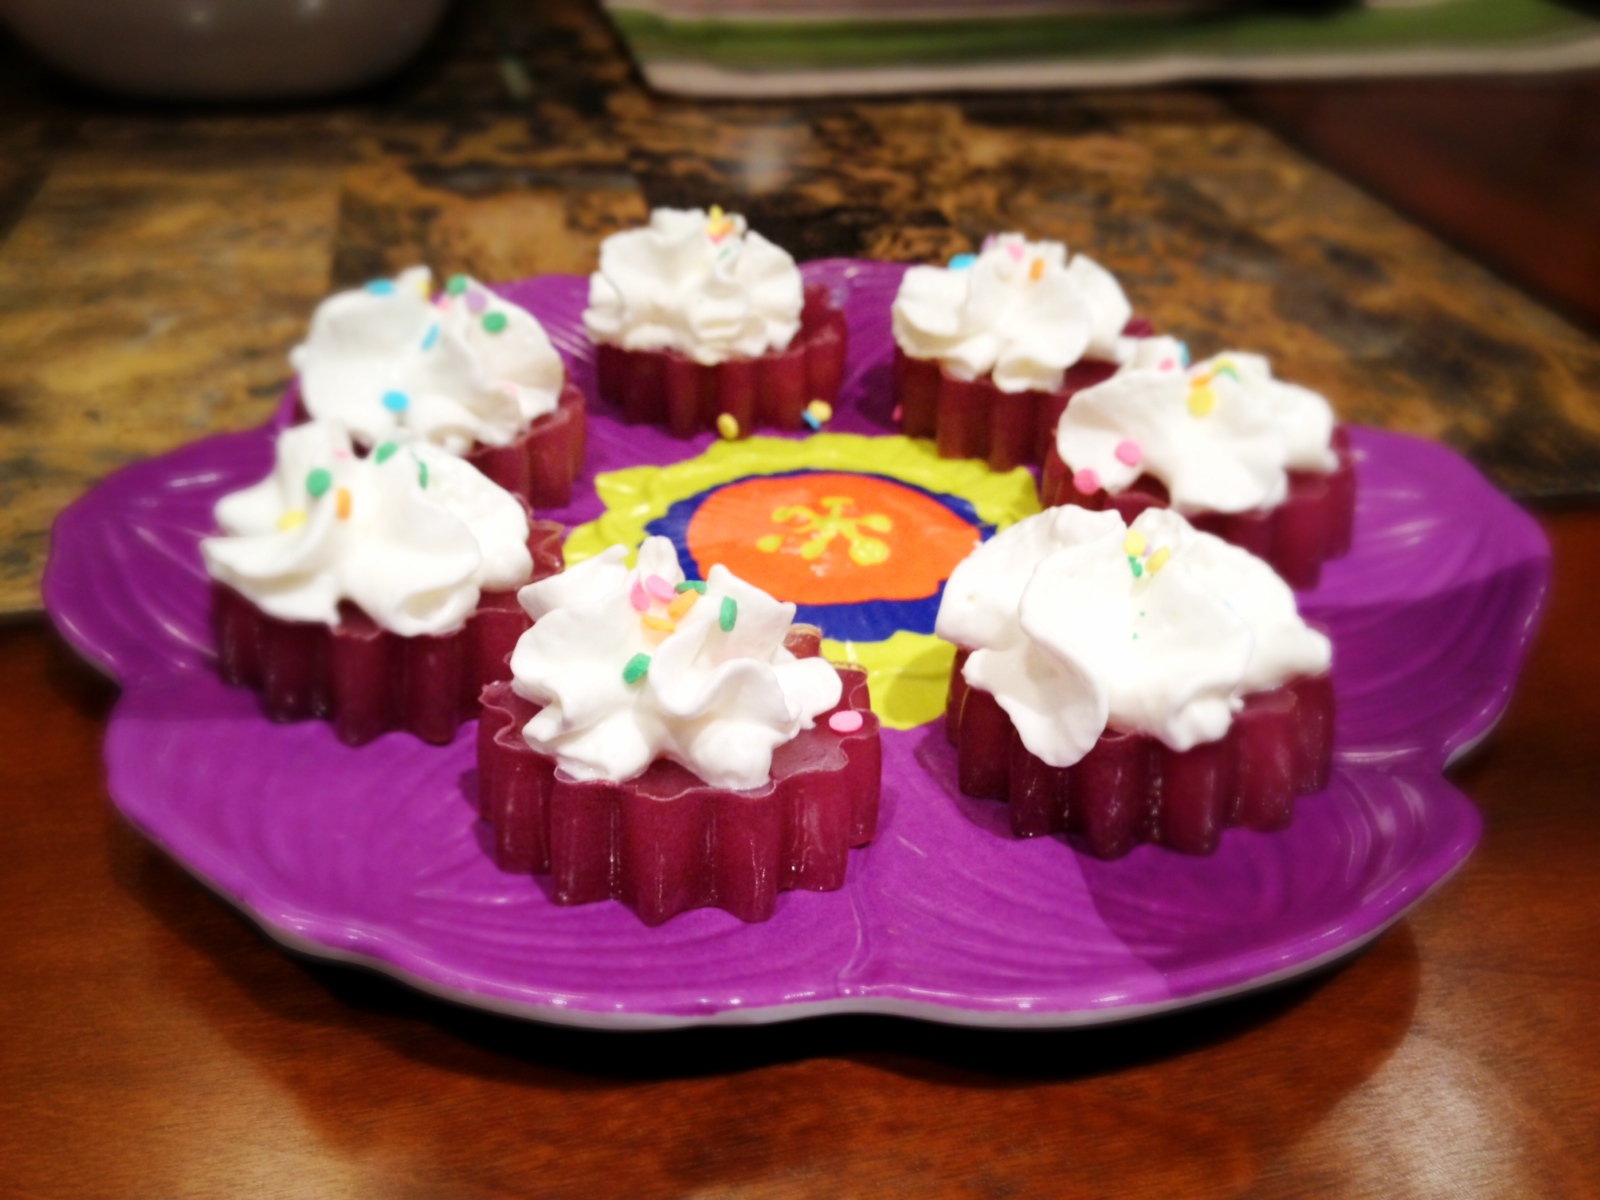
While in Arizona we also made some fun jello shots! A few weeks ago I found a cute recipe for birthday cake jello shots on a website that I follow called Sweet Tooth and posted it on Facebook. It seems that recently a whole bunch of fun flavored vodkas have come out such as birthday cake, whipped cream, and even toasted marshmallow. In the past it seemed like only obscure brands such as 3 Olives, Pinnacle, and Frost made these yummy flavors, but even Smirnoff has recently come out with them. As a surprise for me, Chris and Michelle got all the required ingredients so that we could make them...

What You'll Need

Birthday Cake Jello Shots
recipe adapted from Sweet Tooth's Birthday Cake Jello Shots

2/3 cup cream soda
2/3 cup cranberry juice
1 tbsp heavy cream
2 envelopes plain gelatin
2/3 cup cake flavored vodka
few drops of food coloring, if desired
whipped cream
sprinkles
mini cake silicone mold


1. Lightly spray mold with non-stick spray and wipe excess off so it doesn't affect the taste of the jello.
2. Pour the soda, juice, and cream into a saucepan. Sprinkle the gelatin on top and allow it to soak into the liquid for a couple minutes. Then turn the heat on low and stir until the gelatin is fully dissolved, approximately 5 minutes.
3. Remove from heat and add vodka and food coloring.
4. Pour into mold and chill in refrigerator for several hours until set.
5. Remove from mold. Top with whipped cream and sprinkles


These jello shots were delicious and we all had quite a few. In all honestly, they are going to get you drunk or even really buzzed but they are cute and very tasty. These will also be a repeat recipe...

Thursday, February 23, 2012

Ultimate Vanilla Challenge

Most people who know me know that I would love to own my own bakery and it goes with out saying that I bake A LOT!! But one day my mom said to me "you should probably start figuring out some signature flavors". Well, she is totally right! I can't open my own bakery and not have a menu full of my own recipes. So I have decided to start with the most basic cupcake: vanilla. Yes, I have set out to find the very best vanilla cupcake and won't stop until it is perfect. I don't think that's too much to ask for, do you? For my first experiment i thought i'd try a recipe that claims to be "The Ultimate Vanilla Cupcake".

What You'll Need

The Ultimate Vanilla Cupcake
recipe adapted from The Cupcake Project's Ultimate Vanilla Cupcake

1 cup of sugar
1 vanilla bean
1 3/4 cup flour
1 1/2 tsp baking powder
1/2 tsp baking soda
1/2 tsp salt
1/4 cup unsalted butter
2 large eggs
1/3 cup sour cream
1/4 cup vegetable oil
1 tblsp vanilla
2/3 cup milk

First i made vanilla sugar by combining the sugar with the vanilla bean. Personally, I love vanilla sugar and generally have some around the house but happened to be out. In fact, when I use vanilla beans i put the left over bean pod in either my vanilla sugar of homemade vanilla extract. Those darn beans cost so much i'm determined to get the max use out of them!! Now, for those of you who have never worked with real vanilla beans before, have no fear, it is quite simple. Just lay the bean out on a flat surface and use a sharp knife to cut open the bean running along the entire length. Once open, scrape down the inside of the bean with the dull side of the knife. This will scrape out all the tiny little flecks of vanilla. Those tiny little flecks are what you want, not the pod. If you have it, you can substitute vanilla bean paste but you won't need as much because it is highly concentrated.

I then mixed together the flour, baking powder, baking soda, and salt. Then I added the vanilla sugar. Then I added the butter and mixed it until it formed a crumb like texture. In a separate bowl, i whisked together the eggs, sour cream, oil and vanilla. I then mixed the egg and flour mixture together until they were just combined. Then I slowly added in the milk. This resulted in what looked like and extremely liquidy batter, but the recipe said that was how it should look so i trusted it.

I filled the the cupcake liners a little over half full and baked them at 350 for about 17-18 minutes. The original recipe said they would only need approximately 15 minutes but when i inserted a toothpick into them at 15 minutes they were still fairly wet. Once they were completely done, i flipped them out onto a cooling rack and started on the frosting. **I'd like to mention that I LOVE using real vanilla beans because i think all the little flecks look pretty in the cupcake!


For the frosting I decided to try a vanilla buttercream recipe that came from the same site as the cupcakes. I typically don't make buttercreams and prefer to make cream cheese frostings but that is what the author said as well. She even went as far as to say that this was one of her favorite frostings and tasted like melted vanilla ice cream. So i though, "This, I have to try!".

What You'll Need

Vanilla Bean Buttercream Frosting
recipe adapted from The Cupcake Project's Vanilla Bean Buttercream Frosting

1 1/2 cup powdered sugar (you can add more until the frosting reaches your preferred consistency)
1/2 cup unsalted butter
2 tsp vanilla bean paste
1 tblsp milk

Mix together the sugar and butter until they are creamy.Then add the vanilla bean paste and milk. You can add more sugar if the frosting isn't as thick as you'd like it.

After I make frostings I ALWAYS stick my finger in it and have a little sample before i frost my cupcakes. Let me just say that the woman from The Cupcake Project was correct, this is melted vanilla ice cream in my your mouth!! It is so sweet but yet so amazingly delicious! And just like the cupcakes, the little flecks of vanilla only added to my enchantment. 

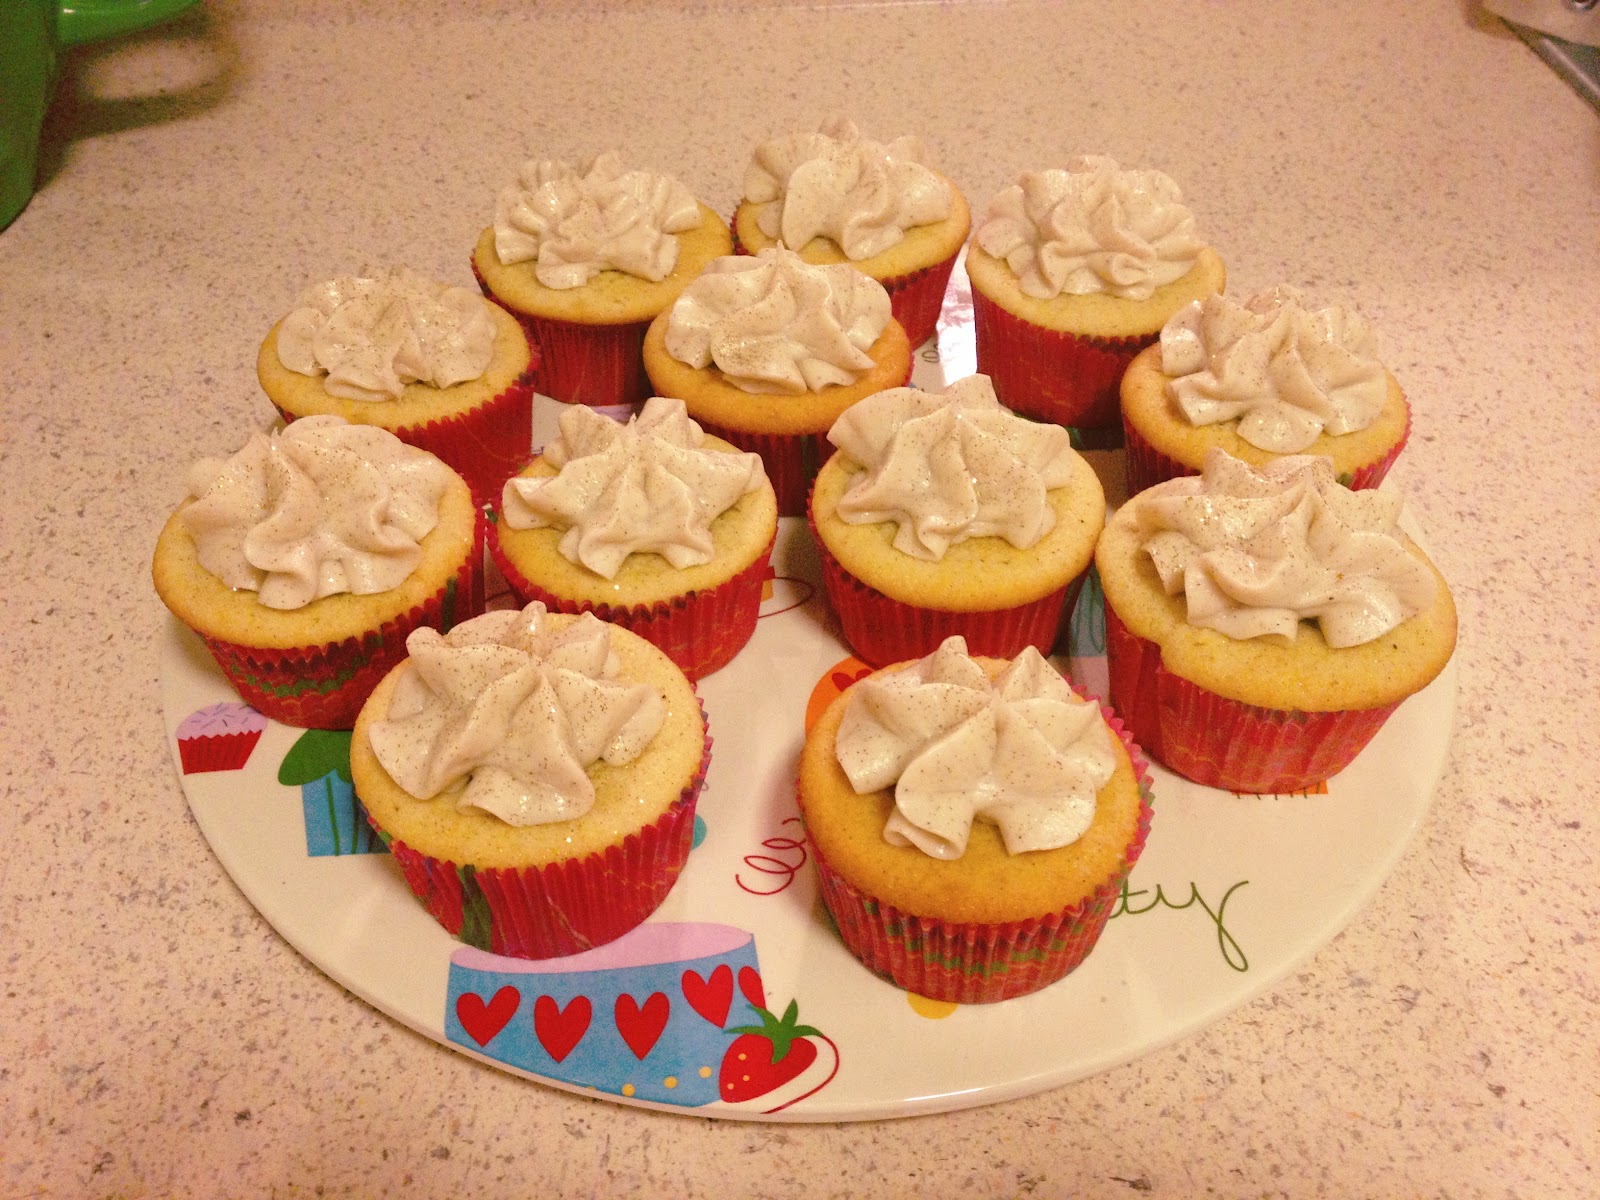
Now for the fun part... frosting the cupcakes. Since the frosting was pretty sweet i decided that you wouldn't need a huge swirl of frosting on top (and I couldn't find my 1A tip anyways) so I opted to use a 1M (large closed star) tip and just put a dollop on top of each cupcake.


And because I am a perfectionist I decided to spruce them up a little bit and sprinkle some edible gold dust on top to add some pizazz! **Shout out to my sister, Alana, for buying me the "disco dust"!


First things first, these were good cupcakes! I must say they were tasty, light and fluffy, and moist. And the frosting was literally the icing on the cake. All my coworkers said they were delicious and couldn't believe they were eating gold dust! With that said, I'm not convinced this was "The Ultimate Vanilla Cupcake". I don't know what it is that i'm missing but it just didn't scream out Amazing Vanilla to me. Never the less, this is a good vanilla cake that i'd recommend anyone try.

Saturday, March 3, 2012

Mudslide!!

Posted by Sweet Lissie at 3:08 PM 0 comments

Over a year ago a group of my friends and I decided to start a book club. The idea was simple: we'd get to read books that we otherwise wouldn't have read and it would be an good excuse to get together and hang out (and of course drink).  That's right, I said drink. My friends and I can drink with the best of them. So when it was time to meet up for our most recent book club meeting I thought it was appropriate to make some boozy cupcakes, yet again. 

As I was looking through one of my favorite blogs, The Cupcake Project, I saw a recipe for pumpkin mudslide cupcakes and was intrigued. I still want to make them, but a couple people said they though the mixture of pumpkin and mudslide sounded weird so I decided to make a regular mudslide cupcake with a Kahlua cream cheese frosting. A few months ago I made a White Russian cupcake and was really disappointed with the result because I could hardly taste any of the alcohol flavor which sort of is the point in a White Russian cupcake. So this time, i decided I was going to amp up the alcohol factor... 


Another fun fact, I finally got to use the whisk attachment on my Kitchen Aid Mixer Stand! As a result, the cupcakes turned out super light and fluffy and rose perfectly. In fact, a coworker of mine declared these cupcakes were the best she'd ever had in terms of the cake consistency.


The recipe I found for the mudslide cupcakes called for a Kahlua buttercream but I love cream cheese frostings so much more so I decided to switch it up and the end result was delicious! The cakes had a hint of the mudslide alcohol flavor. Nothing too strong, but it was definitely there. The frosting was not too overly sweet and had a great Kahlua flavor. Together, the cupcake and frosting tasted like I was drinking a mudslide! 


This is what SUCCESS looks like!! And one last happy picture of a happy baker...


Mudslide Cupcakes
recipe adapted from HandleTheHeat.com

Ingredients
2 1/4 cups flour
1/2 cup unsweetened cocoa powder
1 1/2 tsp baking soda
3/4 cup coffee, room temperature
1/2 cup Kahlua
1/2 cup Bailey's Irish Cream
3 large eggs, separated
3/4 cup sugar
1/2 cup unsalted butter
1 cup light brown sugar

1. Preheat oven to 350 degrees F. Line cupcake pans with liners.

2. Whisk together the flour, cocoa, and baking soda in a medium bowl. Combine the coffee, Kahlua and Bailey's in a liquid measuring cup.

3. Add the egg whites to the bowl of a stand mixer fitted with the whisk attachment. Beat on medium-low speed until foamy. With the mixer still running, gradually add the granulated sugar. Once incorporated, increase the mixer to medium-high speed and continue beating until stiff peaks form. The egg whites should be glossy, not dry.

4. Transfer the egg whites to another bowl and clean our the mixer bowl (or use a second bowl, or use a hand-held electric mixer). With the paddle attachment, cream the butter and brown sugar on medium speed until light and fluffy. Add the egg yolks, one at a time. With the mixer on low speed, alternatively add the flour and the coffee-Kahlua mixture, beginning and ending with the flour mixture. Use a rubber spatula to fold in egg whites.

5. Divide batter evenly between cupcake pans, filling each about 2/3 - 3/4 full. Bake for 18-20 minutes, or until the cupcakes spring back when lightly pressed and a toothpick inserted in the center comes out clean. Transfer the pan to a wire rack and let the cupcakes cool for 5 minutes then remove to rack to cool completely. 

Kahlua Cream Cheese Frosting
recipe adapted from LovinTheOven.com

Ingredients
5 oz cream cheese
6 tbsp unsalted butter
3 tbsp Kahlua
16 oz powdered sugar

1. Cream together cream cheese and butter until fluffy. Mix in Kahlua, then powdered sugar in one cup increments until frosting reaches desired consistency.

Monday, February 27, 2012

Tiramisu cupcakes and Jello Shots!

Posted by Sweet Lissie at 9:19 PM 0 comments
Unfortunately, working for a bank means rarely having a 2 day consecutive weekend and being married to a fellow banker means its pretty much unlikely that we can both get the same weekends off to plan a "weekend getaway". So when Mike and I get those rare opportunities to both have a 3 day holiday weekend off we make plans! That was the case this past weekend for Presidents Day. Mike and I drove out to Arizona to visit our friends, Chris and Michelle. Like me, Michelle loves cupcakes so it should be no surprise that on top of hanging out and having fun we BAKED SOME CUPCAKES!

That's right, we made cupcakes. But not just any old cupcakes, tiramisu cupcakes. If you haven't ever had tiramisu or don't know what it is then i suggest you RUN to your nearest store and buy some now! Hahaha. All jokes aside, I love tiramisu. Its an Italian cake dessert. Basically, it's made of ladyfingers soaked in coffee and liquor, layered with a whipped mixture of egg yolks and mascarpone and dusted with cocoa powder. Obviously we were going to have to tweak the design a little to make in a cupcake form but the end result was AMAZING. Keep in mind that I don't typically declare my own cupcakes to be "amazing" simply because I am always very critical of what I bake and am pretty sure I can always improve in some aspect. With that said, I still believe these cupcakes were AMAZING!!!

What You'll Need


Tiramisu Cupcakes
recipe adapted from The Cupcake Project's Tiramisu Cupcakes

6 egg yolks
3/4 cup sugar
2/3 cup milk
1 1/4 cup heavy whipping cream
1/2 tsp vanilla
1 lb mascarpone cheese
1 cup strong brewed coffee, room temperature
2 tbsp rum
1 tbsp unsweetened cocoa powder
2 tbsp butter
dark chocolate (to make chocolate curls, optional)
ladyfingers baked in cupcake wrappers (see recipe below)

Homemade Ladyfingers
2 eggs, separated
1/3 cup + 1 tbsp sugar
1/2 cup flour
1/4 tsp baking powder


1. First things first, brew 1 cup of coffee and allow to come to room temperature.
2. In a saucepan, melt dark chocolate and butter over medium-low heat until smooth. Line a small, deep pan such as a bread pan with aluminum foil and pour melted chocolate on top of the aluminum. Place in refrigerator and allow to harden.
3. Next, In a medium saucepan, whisk the egg yolks and sugar together until combined. Slowly add milk and cook over medium heat . Stir occasionally until mixture comes to a boil. Allow mixture to boil for a minute then remove from heat. Cover tightly and chill in refrigerator for about an hour.

Next up, homemade ladyfingers! Preheat oven to 400F and line cupcake tin with cupcake liners.

4. In a small bowl, whisk together the flour and baking powder.
5. In another bowl, beat egg whites on high until soft peaks form. Slowly add 1 tbsp of the sugar and keep beating until they are stiff and glossy.
6. In another bowl, beat the egg yolks and remaining sugar until they become very pale in color.
7. Fold half the egg whites into the egg yolk mixture. Fold in the flour, then the remaining egg whites.
8. Evenly spoon a small amount of the batter into the cupcake liners and bake for 8 minutes. This will be the ladyfinger base of the tiramisu cupcake so you want to make sure there will be enough room on top of the ladyfingers for the mascarpone and whipped cream.

9. Remove the egg yolk mixture from the refrigerator and whisk in mascarpone until smooth, set aside.
10. In a bowl, beat whipping cream and vanilla until stiff peaks form, set aside.
11. In a small bowl, combine coffee and rum. Slowly pour several spoonfuls of the coffee/rum mixture over each ladyfinger, allowing it time to soak into the cake until it stops absorbing.
12. Spread the mascarpone over each soaked ladyfinger.


13. Spoon a dollop of whipped cream on top of the mascarpone.
14. Sprinkle with cocoa powder.
15. Remove the chocolate from the freezer and make chocolate curls using a vegetable peeler. If the curls easily break allow chocolate to warm up slightly. I find this technique works best if the chocolate is at room temperature. Place several of the curls on top of each cupcake.
16. Cover and refrigerate for several hours, until set.


As i said above, these were amazingly good! So good in fact, I don't have a single complaint about them and will definitely be making these again! 

While in Arizona we also made some fun jello shots! A few weeks ago I found a cute recipe for birthday cake jello shots on a website that I follow called Sweet Tooth and posted it on Facebook. It seems that recently a whole bunch of fun flavored vodkas have come out such as birthday cake, whipped cream, and even toasted marshmallow. In the past it seemed like only obscure brands such as 3 Olives, Pinnacle, and Frost made these yummy flavors, but even Smirnoff has recently come out with them. As a surprise for me, Chris and Michelle got all the required ingredients so that we could make them...

What You'll Need

Birthday Cake Jello Shots
recipe adapted from Sweet Tooth's Birthday Cake Jello Shots

2/3 cup cream soda
2/3 cup cranberry juice
1 tbsp heavy cream
2 envelopes plain gelatin
2/3 cup cake flavored vodka
few drops of food coloring, if desired
whipped cream
sprinkles
mini cake silicone mold


1. Lightly spray mold with non-stick spray and wipe excess off so it doesn't affect the taste of the jello.
2. Pour the soda, juice, and cream into a saucepan. Sprinkle the gelatin on top and allow it to soak into the liquid for a couple minutes. Then turn the heat on low and stir until the gelatin is fully dissolved, approximately 5 minutes.
3. Remove from heat and add vodka and food coloring.
4. Pour into mold and chill in refrigerator for several hours until set.
5. Remove from mold. Top with whipped cream and sprinkles


These jello shots were delicious and we all had quite a few. In all honestly, they are going to get you drunk or even really buzzed but they are cute and very tasty. These will also be a repeat recipe...

Thursday, February 23, 2012

Ultimate Vanilla Challenge

Posted by Sweet Lissie at 8:16 PM 0 comments
Most people who know me know that I would love to own my own bakery and it goes with out saying that I bake A LOT!! But one day my mom said to me "you should probably start figuring out some signature flavors". Well, she is totally right! I can't open my own bakery and not have a menu full of my own recipes. So I have decided to start with the most basic cupcake: vanilla. Yes, I have set out to find the very best vanilla cupcake and won't stop until it is perfect. I don't think that's too much to ask for, do you? For my first experiment i thought i'd try a recipe that claims to be "The Ultimate Vanilla Cupcake".

What You'll Need

The Ultimate Vanilla Cupcake
recipe adapted from The Cupcake Project's Ultimate Vanilla Cupcake

1 cup of sugar
1 vanilla bean
1 3/4 cup flour
1 1/2 tsp baking powder
1/2 tsp baking soda
1/2 tsp salt
1/4 cup unsalted butter
2 large eggs
1/3 cup sour cream
1/4 cup vegetable oil
1 tblsp vanilla
2/3 cup milk

First i made vanilla sugar by combining the sugar with the vanilla bean. Personally, I love vanilla sugar and generally have some around the house but happened to be out. In fact, when I use vanilla beans i put the left over bean pod in either my vanilla sugar of homemade vanilla extract. Those darn beans cost so much i'm determined to get the max use out of them!! Now, for those of you who have never worked with real vanilla beans before, have no fear, it is quite simple. Just lay the bean out on a flat surface and use a sharp knife to cut open the bean running along the entire length. Once open, scrape down the inside of the bean with the dull side of the knife. This will scrape out all the tiny little flecks of vanilla. Those tiny little flecks are what you want, not the pod. If you have it, you can substitute vanilla bean paste but you won't need as much because it is highly concentrated.

I then mixed together the flour, baking powder, baking soda, and salt. Then I added the vanilla sugar. Then I added the butter and mixed it until it formed a crumb like texture. In a separate bowl, i whisked together the eggs, sour cream, oil and vanilla. I then mixed the egg and flour mixture together until they were just combined. Then I slowly added in the milk. This resulted in what looked like and extremely liquidy batter, but the recipe said that was how it should look so i trusted it.

I filled the the cupcake liners a little over half full and baked them at 350 for about 17-18 minutes. The original recipe said they would only need approximately 15 minutes but when i inserted a toothpick into them at 15 minutes they were still fairly wet. Once they were completely done, i flipped them out onto a cooling rack and started on the frosting. **I'd like to mention that I LOVE using real vanilla beans because i think all the little flecks look pretty in the cupcake!


For the frosting I decided to try a vanilla buttercream recipe that came from the same site as the cupcakes. I typically don't make buttercreams and prefer to make cream cheese frostings but that is what the author said as well. She even went as far as to say that this was one of her favorite frostings and tasted like melted vanilla ice cream. So i though, "This, I have to try!".

What You'll Need

Vanilla Bean Buttercream Frosting
recipe adapted from The Cupcake Project's Vanilla Bean Buttercream Frosting

1 1/2 cup powdered sugar (you can add more until the frosting reaches your preferred consistency)
1/2 cup unsalted butter
2 tsp vanilla bean paste
1 tblsp milk

Mix together the sugar and butter until they are creamy.Then add the vanilla bean paste and milk. You can add more sugar if the frosting isn't as thick as you'd like it.

After I make frostings I ALWAYS stick my finger in it and have a little sample before i frost my cupcakes. Let me just say that the woman from The Cupcake Project was correct, this is melted vanilla ice cream in my your mouth!! It is so sweet but yet so amazingly delicious! And just like the cupcakes, the little flecks of vanilla only added to my enchantment. 

Now for the fun part... frosting the cupcakes. Since the frosting was pretty sweet i decided that you wouldn't need a huge swirl of frosting on top (and I couldn't find my 1A tip anyways) so I opted to use a 1M (large closed star) tip and just put a dollop on top of each cupcake.


And because I am a perfectionist I decided to spruce them up a little bit and sprinkle some edible gold dust on top to add some pizazz! **Shout out to my sister, Alana, for buying me the "disco dust"!


First things first, these were good cupcakes! I must say they were tasty, light and fluffy, and moist. And the frosting was literally the icing on the cake. All my coworkers said they were delicious and couldn't believe they were eating gold dust! With that said, I'm not convinced this was "The Ultimate Vanilla Cupcake". I don't know what it is that i'm missing but it just didn't scream out Amazing Vanilla to me. Never the less, this is a good vanilla cake that i'd recommend anyone try.

Free Blog Template by June Lily